Today I'm going to show you my favorite method of joining granny squares. I learned this join-as-you-go method from the super-talented Sarah London, but I had never seen anyone attempt to use it for anything other than the 3 dc cluster "normal" granny square. (And "cluster" probably isn't the right term for this, but that's what I'm going to call the groups of 3 dc worked into a stitch or space for the rest of this tutorial.)
My method will work for squares that are the same size (later I'll show you how to join different sized squares) but have different types of outer rounds. It works best if you make your corners with a chain space.
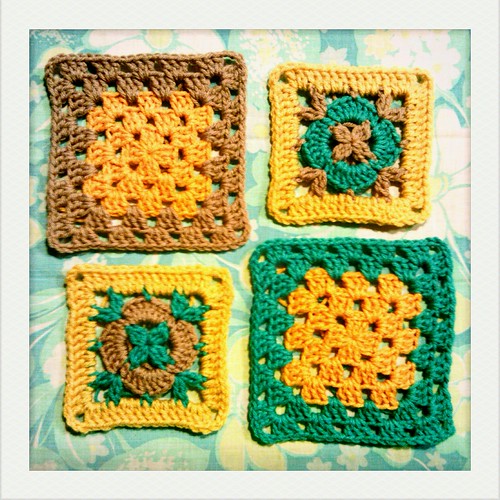
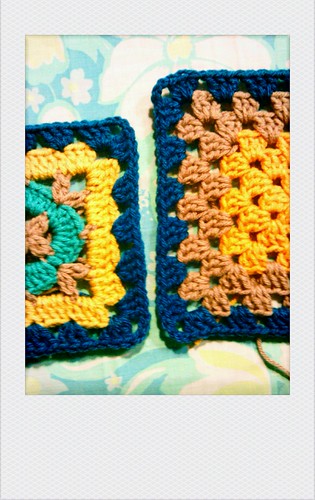
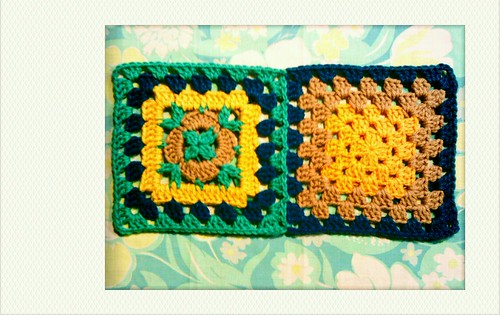
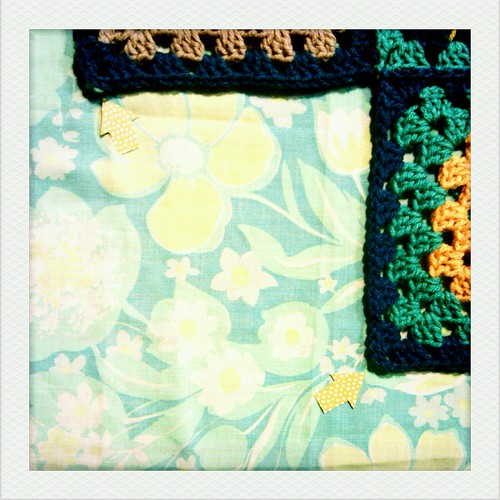
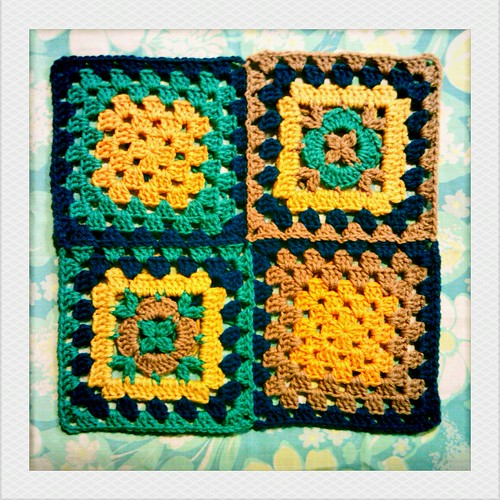
The flower squares in the photo below were the same size as the granny squares until I added one more round to the grannies. (I forgot to take a picture when they were actually the same size!)
My method will work for squares that are the same size (later I'll show you how to join different sized squares) but have different types of outer rounds. It works best if you make your corners with a chain space.
The flower squares in the photo below were the same size as the granny squares until I added one more round to the grannies. (I forgot to take a picture when they were actually the same size!)
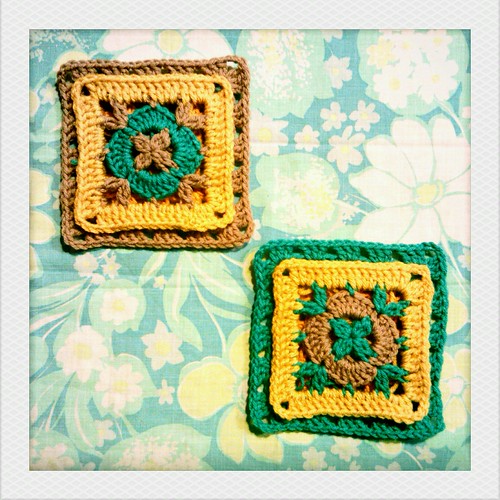
To make them the same size, you can see that I just need to add one more round to the flowers. You will want the same number of 3dc clusters around the squares, so you'll need to do a little bit of math to figure out where to place your clusters. The grannies have five clusters along each side, so we have to have five along each side of the flowers.
Note: This method will work for granny squares of any size, not just the 4.5" square I'm using. Depending on the size of your squares, you may have to use more or fewer clusters on the last round. If you're having trouble figuring out how many clusters to work around the edge, crochet a basic granny square to match the size of all of your other squares then add one more round. Count the number of clusters along each side of your sample granny square. This is how many clusters you'll need to make on the final round of every square.
Note: This method will work for granny squares of any size, not just the 4.5" square I'm using. Depending on the size of your squares, you may have to use more or fewer clusters on the last round. If you're having trouble figuring out how many clusters to work around the edge, crochet a basic granny square to match the size of all of your other squares then add one more round. Count the number of clusters along each side of your sample granny square. This is how many clusters you'll need to make on the final round of every square.
The formula I use to figure out how to evenly place the clusters is this:
(y-x) / (x + 1) = z
x = the number of clusters you need along one side minus two (for the two that will simply go in the corner spaces).
y = the number of stitches along the side of your square.
z = the number of stitches you will skip between each cluster.
In the example shown:
(15 - 3) / (3 + 1) = 12 / 4 = 3 stitches skipped between each cluster.
Okay, so if you're not exactly a math nerd, you can break out some stitch markers and move them around until they look even. Like I've said before, crochet is very forgiving.
Occasionally you won't be able to skip an even number of stitches between each cluster. If I just have one left over, I like to skip an extra stitch for the very first cluster. If I have two left over, I'll usually skip an extra stitch both on the first cluster and the last.
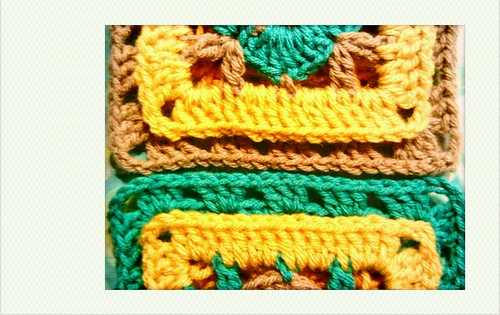
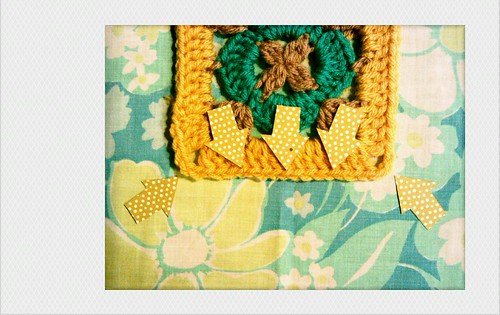
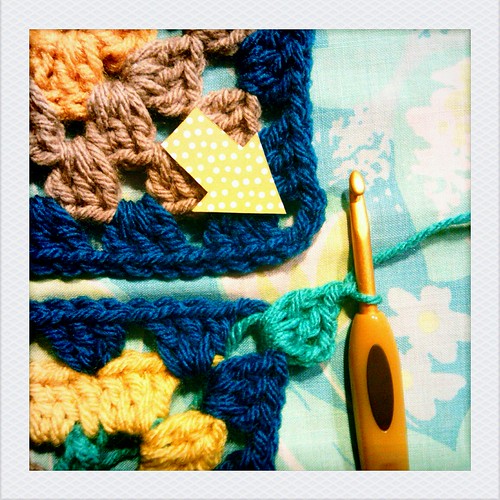
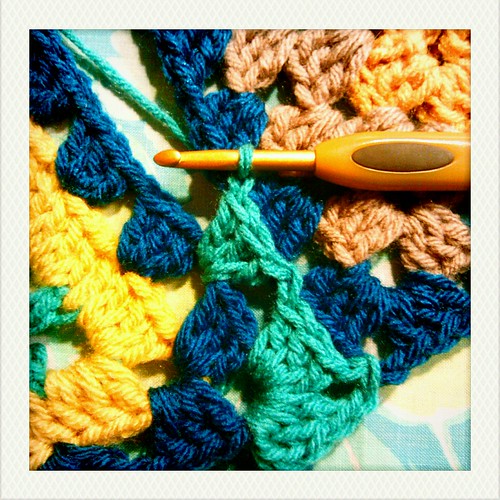
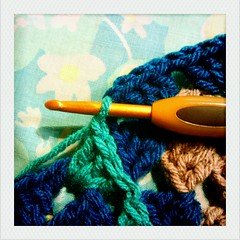
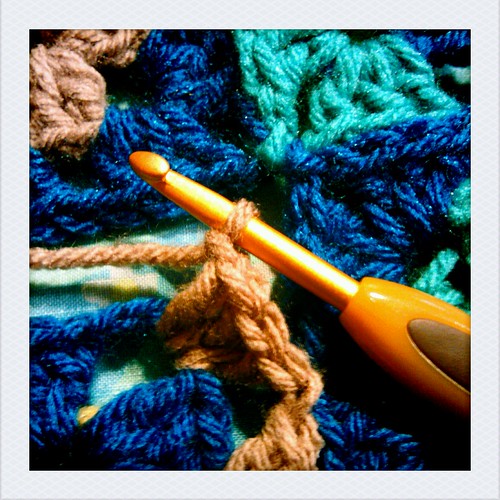
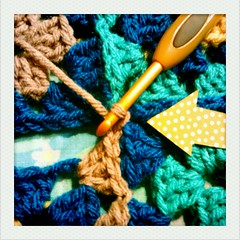
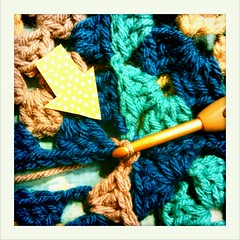
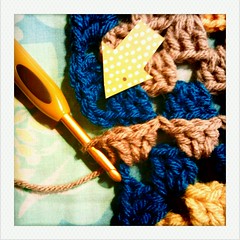
The arrows in the photo below are pointing at the stitches I am going to work the 3 dc clusters into. See how there are three stitches skipped between each one?
(y-x) / (x + 1) = z
x = the number of clusters you need along one side minus two (for the two that will simply go in the corner spaces).
y = the number of stitches along the side of your square.
z = the number of stitches you will skip between each cluster.
In the example shown:
(15 - 3) / (3 + 1) = 12 / 4 = 3 stitches skipped between each cluster.
Okay, so if you're not exactly a math nerd, you can break out some stitch markers and move them around until they look even. Like I've said before, crochet is very forgiving.
Occasionally you won't be able to skip an even number of stitches between each cluster. If I just have one left over, I like to skip an extra stitch for the very first cluster. If I have two left over, I'll usually skip an extra stitch both on the first cluster and the last.
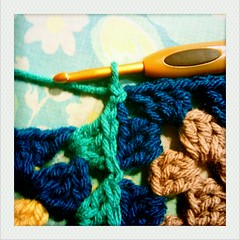
The arrows in the photo below are pointing at the stitches I am going to work the 3 dc clusters into. See how there are three stitches skipped between each one?
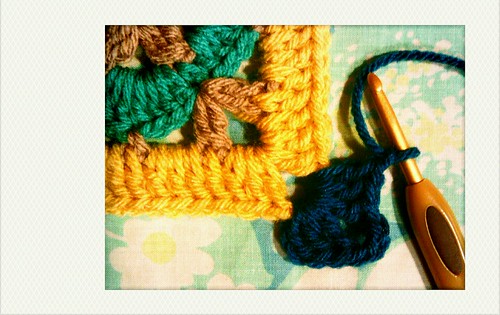
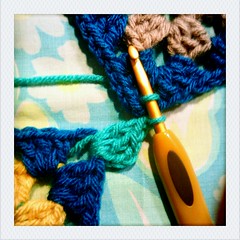
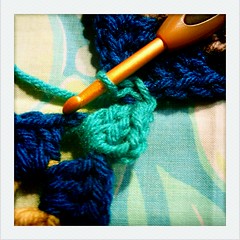
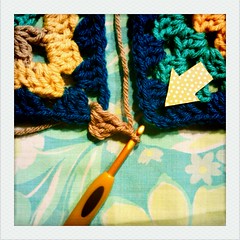
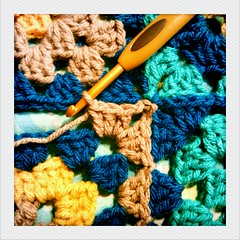
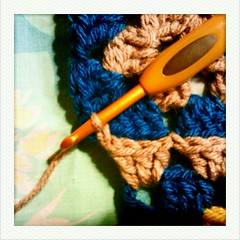
Attach your yarn color of choice to a corner space to get started. Chain 3, 2dc, ch 3, 3 dc in the corner:
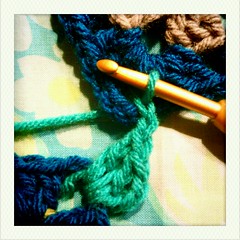
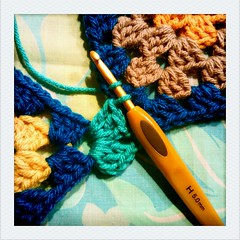
Now work your way across the side of the square making 3 dc in each space you determined with the formula (or your stitch markers) and making a chain stitch between each dc cluster. When you get to the next corner, work 3 dc, ch 3, 3 dc:
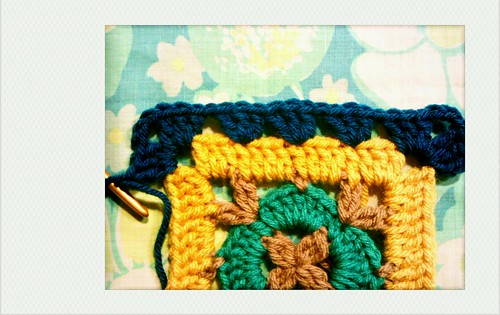
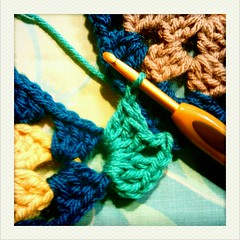
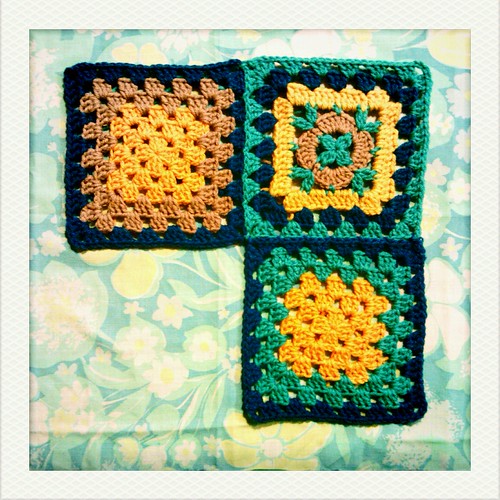
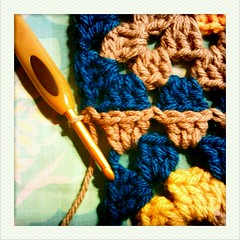
Continue around your square in this manner and finish off with a slip stitch in the 3rd stitch of the beginning chain. Now the squares are the same size, and we're all set to join them together:
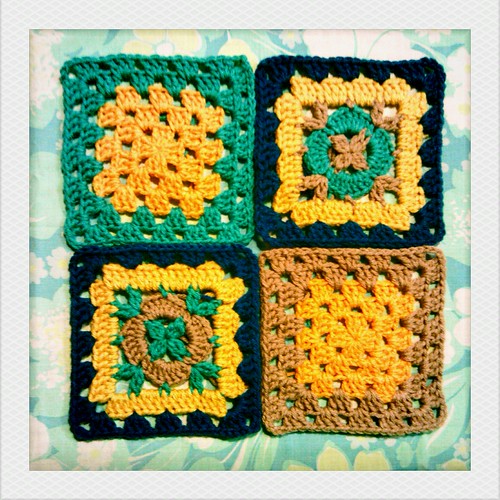
We are going to add a single round to each square all the while joining them to one another. Below I have already added to the brown & yellow granny square to begin.
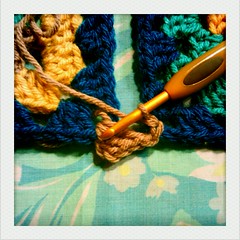
Now we're going to connect the next square to the first as we add the extra round. Begin by attaching your yarn to the corner space of the next square. Ch 3, 2 dc, ch 1, then insert your hook from front to back through the corner space of the first granny square (as indicated by the arrow):
Draw up a loop and pull it through the first loop on your hook to make a slip stitch:
Chain 1 and then work 3 dc into the same corner of your second square. Do not chain 1 between clusters along the edge that you are joining. You are instead going to slip stitch into the next space along the edge of your first granny square (see the arrow):

Again, insert your hook from front to back through the next space in the first square, draw up a loop, and pull it through:
Continue along the side working a cluster in each space of your second square and a slip stitch in the next space of the first square:
When you get to the corner, 3 dc into corner of the second square, ch 1, sl st in the corner of the first square, ch 1, 3 dc into corner of the second square again:
Now work your way around the rest of the second square with 3 dc in each space along the sides with a chain stitch in between. The remaining corners are 3 dc, ch 3, 3 dc:
Join the third square in exactly the same manner:
Filling in this corner with the fourth square is going to be slightly different, but only where the corners of the squares come together in the middle. Begin joining where indicated by the arrow at the bottom right in the photo below. You're going to join two sides for this square (until you get to the next arrow in the upper left of the photo):
Attach your yarn to a corner space of the fourth square. Just as before, ch 3, 2 dc into the corner, ch 1, sl st into the corner indicated by the lower right arrow in the photo above, ch 1, 3 dc in the same corner of the fourth square.
Continue along the side working 3 dc into each corner of the fourth square and a sl st in each open space in the other square until you get to the corner (well, the middle!). Chain 1:
Slip stitch into the corner of the square to the right, then slip stitch into the corner of the square above the fourth square (it is the corner diagonal to the one you just slip stitched into):
Chain 1, work 3 dc in the same corner of the fourth square and keep working across the edge like you have been with a sl st in each space of the square above and 3 dc in each space of the fourth square:
When you get to the final corner to join, ch 1, sl st in the corner, ch 1, 3 dc into the same corner.
Of course, along the outer edges be sure to ch 1 between each cluster. Now you can join any squares as you go!
Note: Slight variations of size and structure in your different squares will be mostly hidden with a single round of the "granny" border, but it will look even more perfect if you plan for two rows of the border around each square.
Note: Slight variations of size and structure in your different squares will be mostly hidden with a single round of the "granny" border, but it will look even more perfect if you plan for two rows of the border around each square.
Now that you know how to join a bunch of different squares together, you should sign up for A Square A Day In May with Melissa over at Hooked on Handmade!
If you have any trouble understanding any part of this tutorial, please let me know! :) And check out the previous tutorials in the series.
granny square tutorial part 1: basic granny square
granny square tutorial part 1: basic granny square

Oh, this is very helpful, thanx!! Clear pictures too, will defenately give this a try!
ReplyDeleteEsther.
Love it! Now I can start joining!
ReplyDeleteThanks again for all you hard work....I will be linking this to my blog!
Lovely tutorial. :)
ReplyDeleteNow I have all of the tools I need to work out some sort of groovy granny thing for our Relay For Life. If I can possibly do it in time with everything else that's going on right now.
thanks for sharing your knlodges.
ReplyDelete